Table of Content
YouTube has become a popular source of entertainment, education, and information. However, there may be cases when you want to limit access to YouTube on your iPad. This guide will walk you through the process of blocking YouTube on your iPad, giving you much-needed control over your online experience.
How to Block YouTube on iPad
Here are the easiest ways that can tell you how to block YouTube on iPad:
Block YouTube Website on iPad
- First of all, click on the Settings app on your iPad.
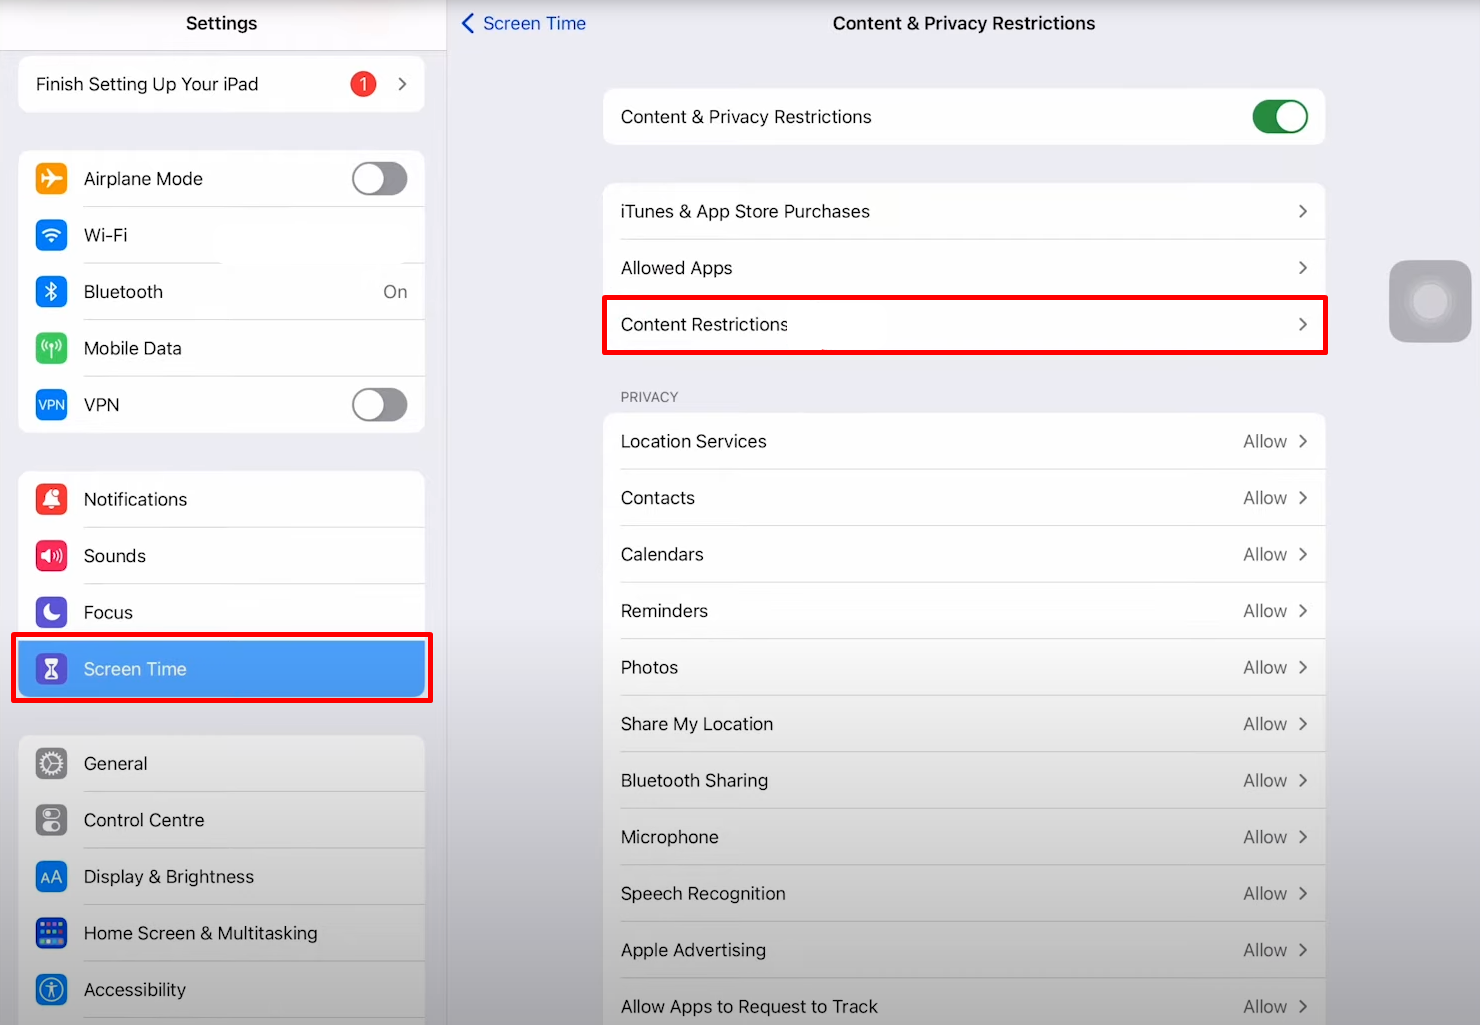
- After that scroll down a bit and click on the Screen Time option on the left panel.
- Click on the Content Restrictions option on the right side of the screen.
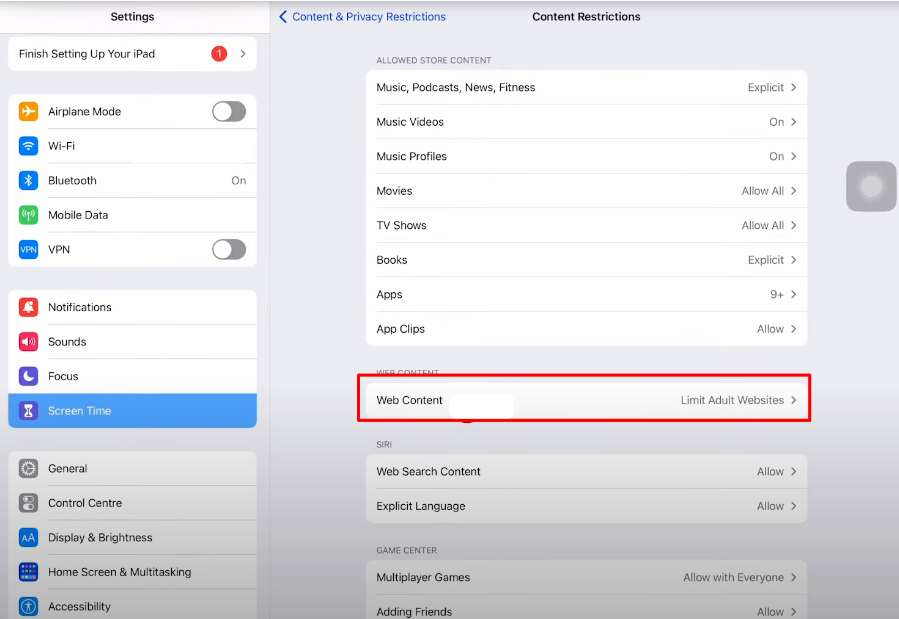
- After that click on the Web Content option on the next page.
- Then click on the Limit Adult Website and then click on the Add Website option under the Never Allow option.
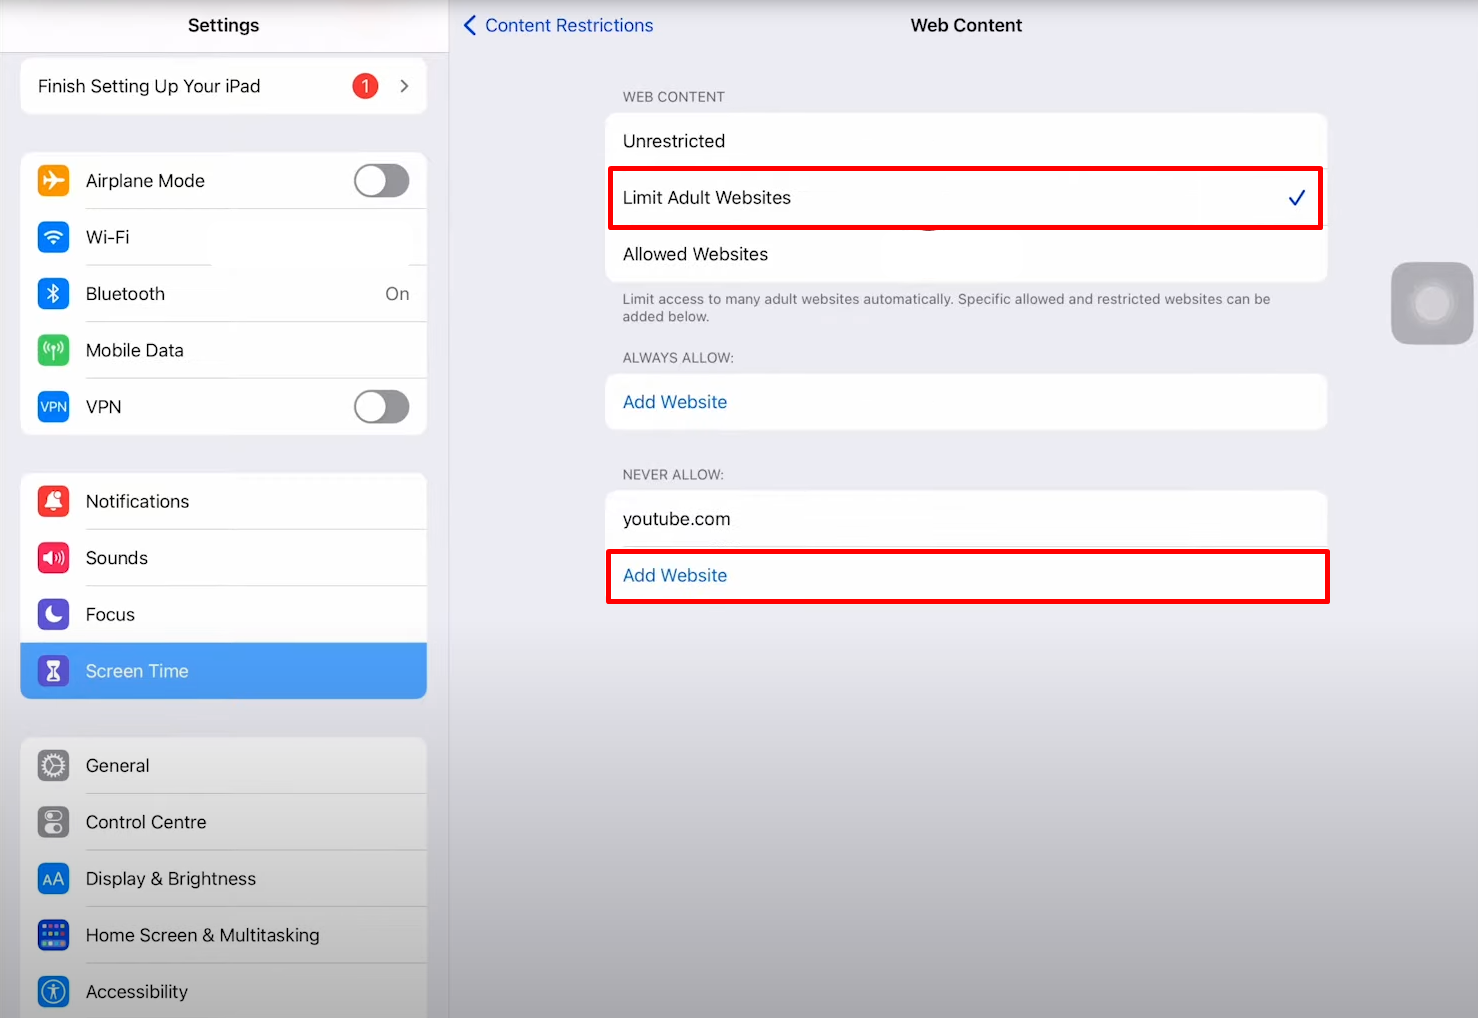
- Now add youtube.com in the URL box and then click on the Enter Key button.
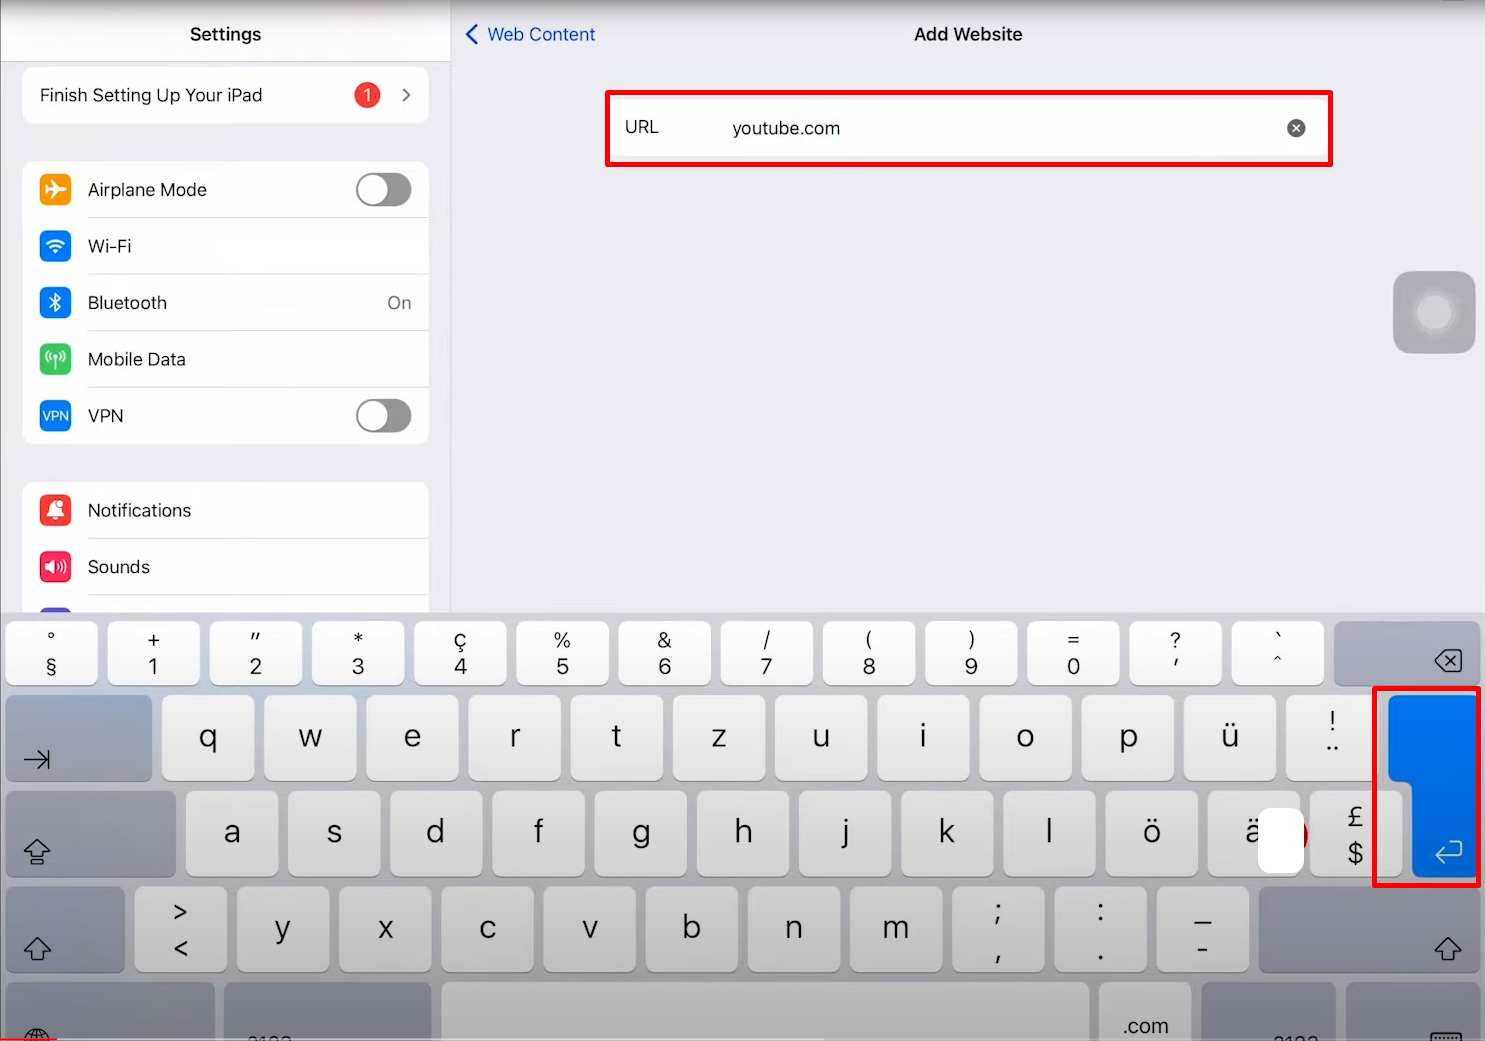
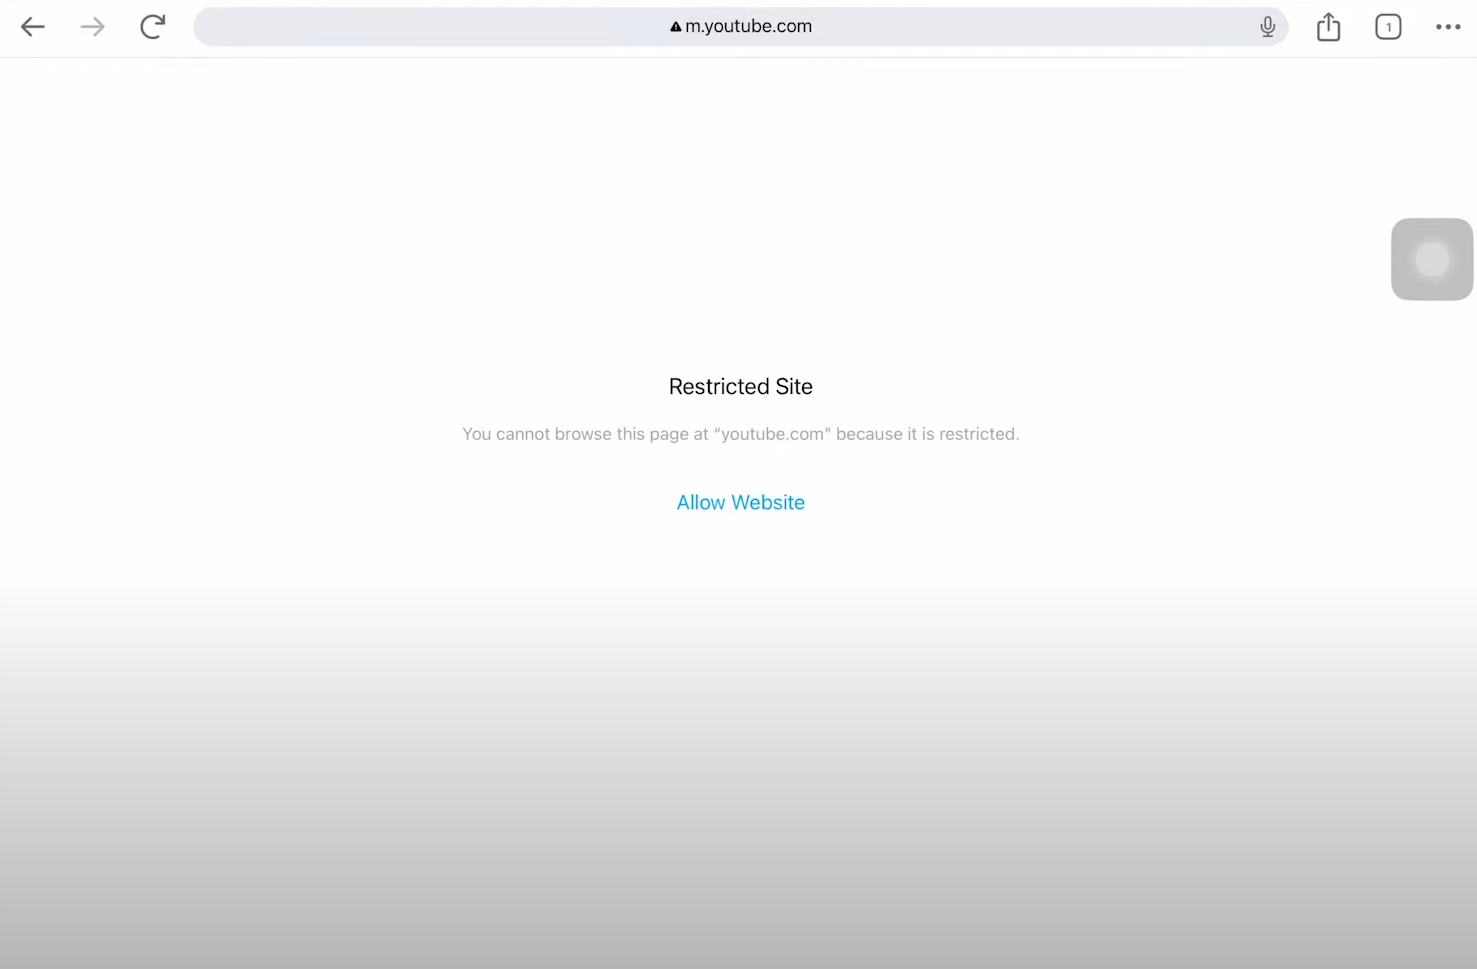
- Now when you try to open YouTube on Safari, you will be restricted to the site and YouTube can not be accessed on it.
- You will not be able to access YouTube on Google Chrome as well.
How to Put a Password on Screen Time Settings
- First of all, click on the Settings app on your iPad.
- After that scroll down a bit and click on the Screen Time option on the left panel.
- Click on the Use Screen Time Passcode option on the right side of the screen.
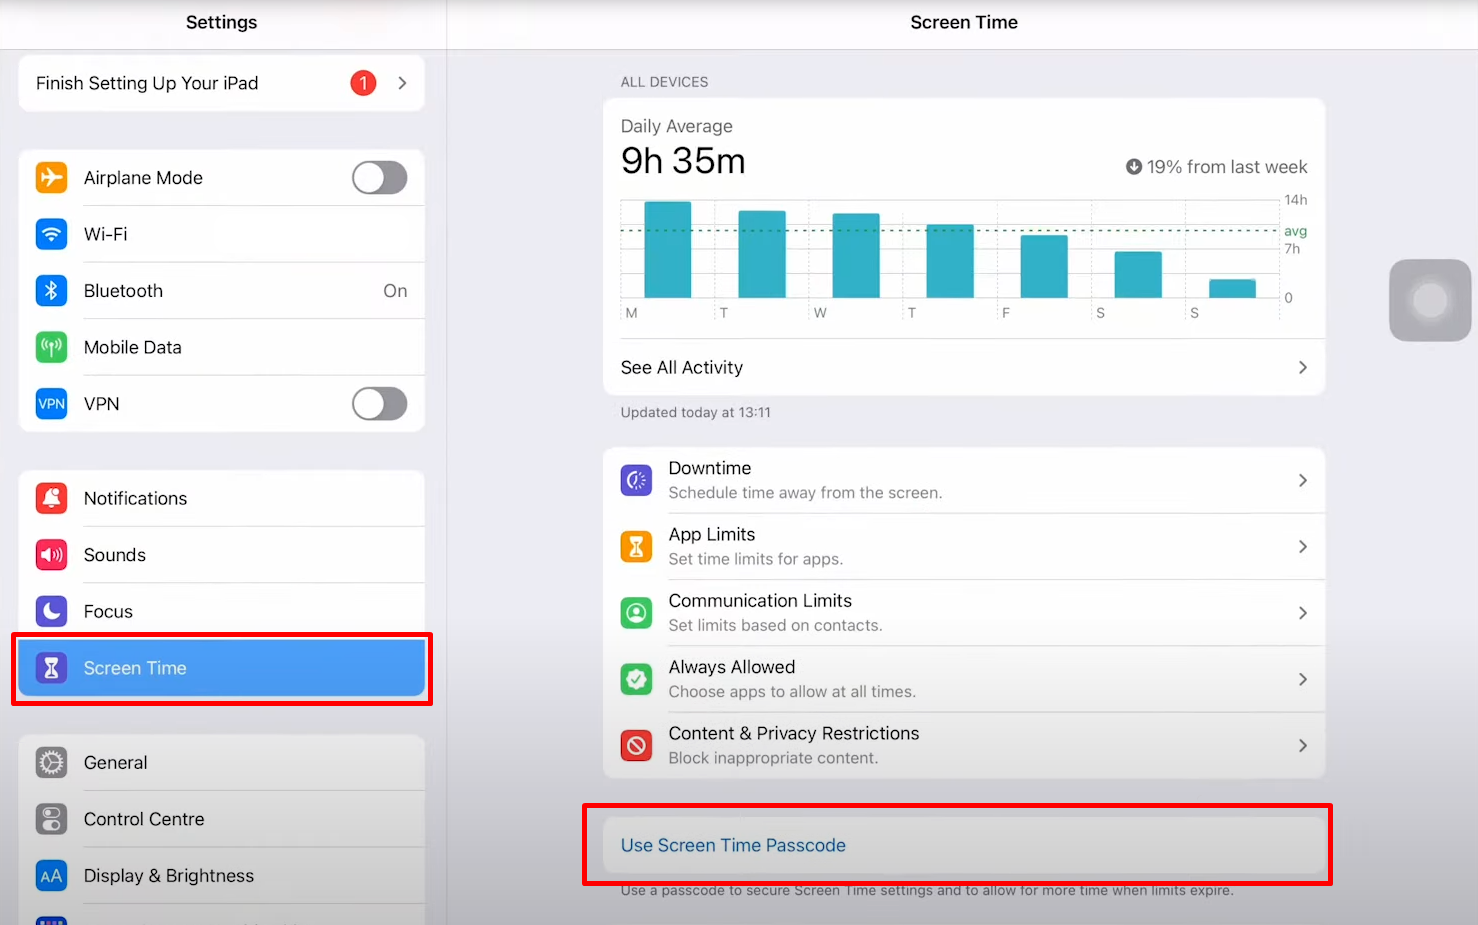
- Then add a passcode and after that enter your Apple ID and password.
- Click on the OK button on the top right corner of the popup window.
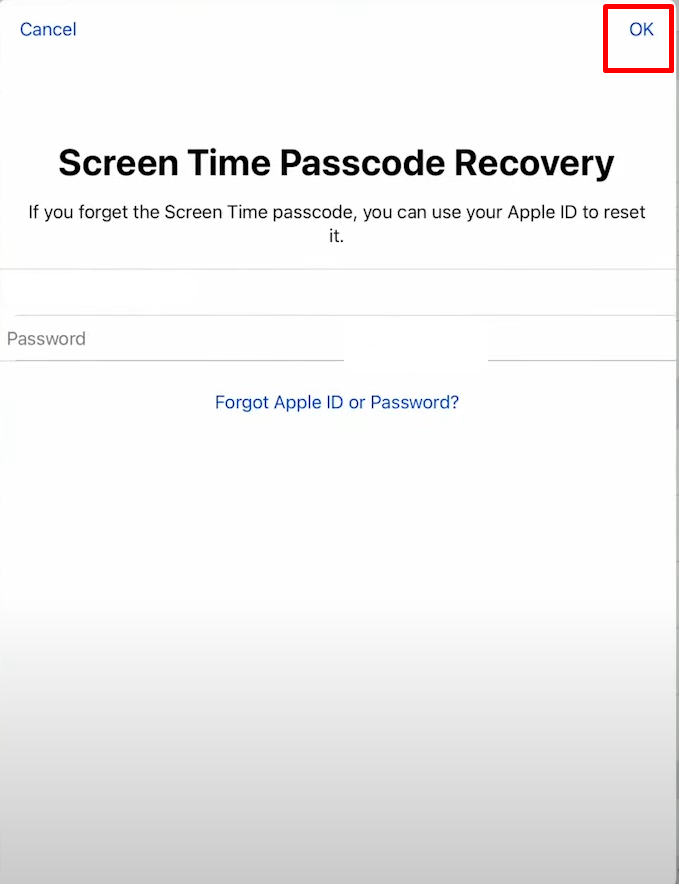
Now if your kid or anyone tries to change the settings they first have to enter the passcode which only you will know.
Block the YouTube App on iPad
- First of all, click on the Settings app on your iPad.
- After that scroll down a bit and click on the Screen Time option on the left panel and then click on the Content Restrictions option on the right side of the screen.
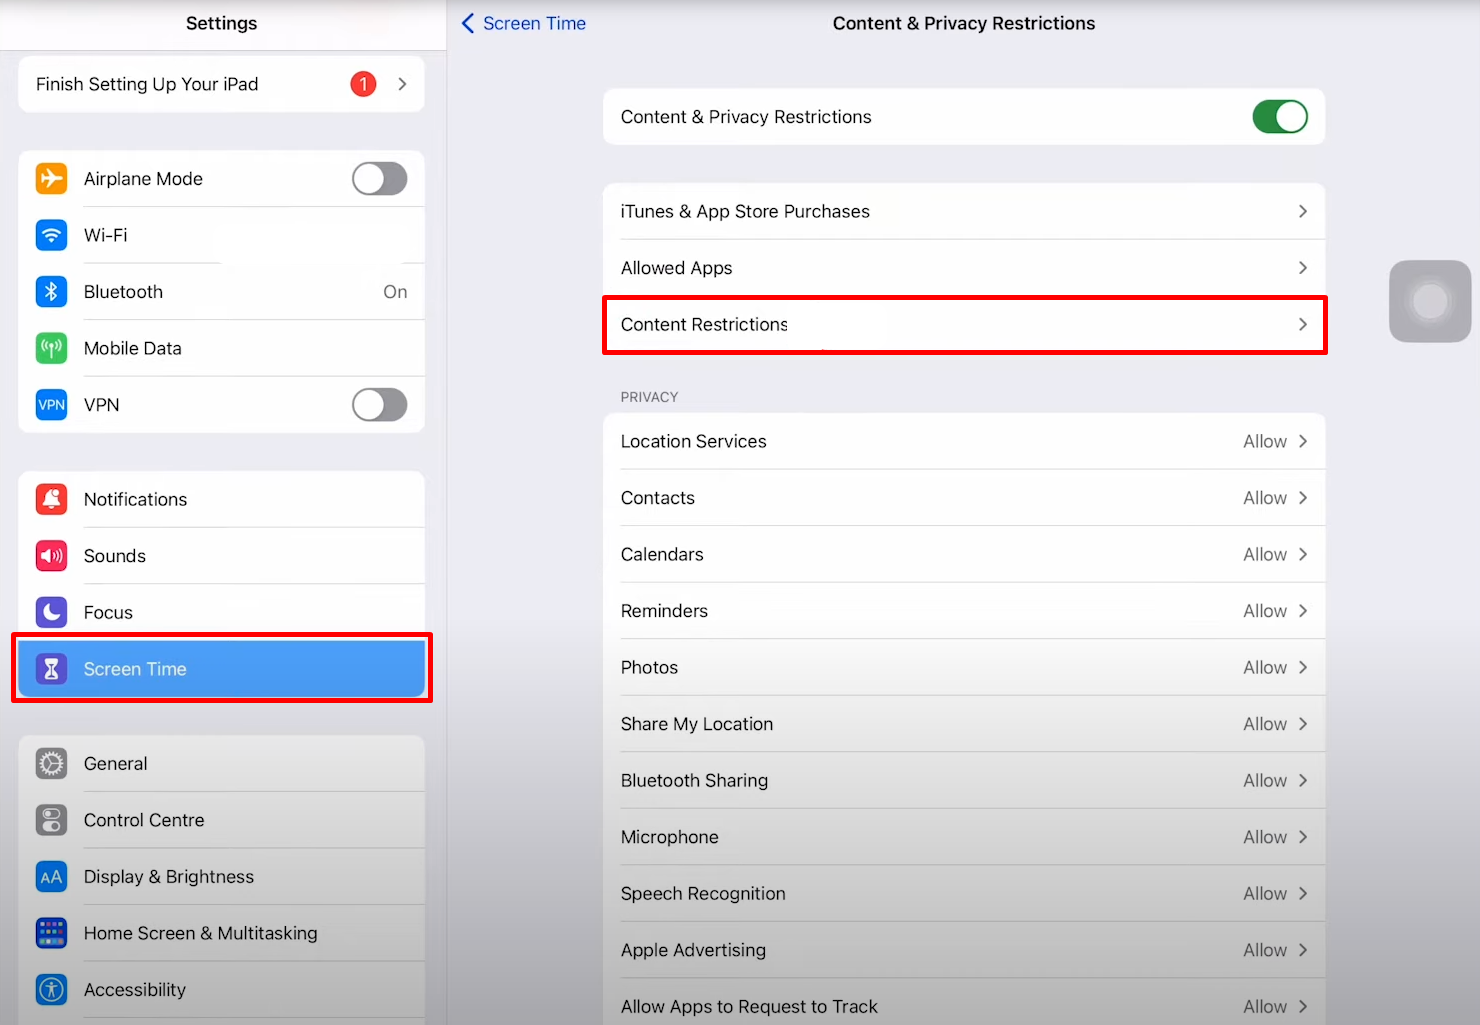
- Now click on the App option on the next page.
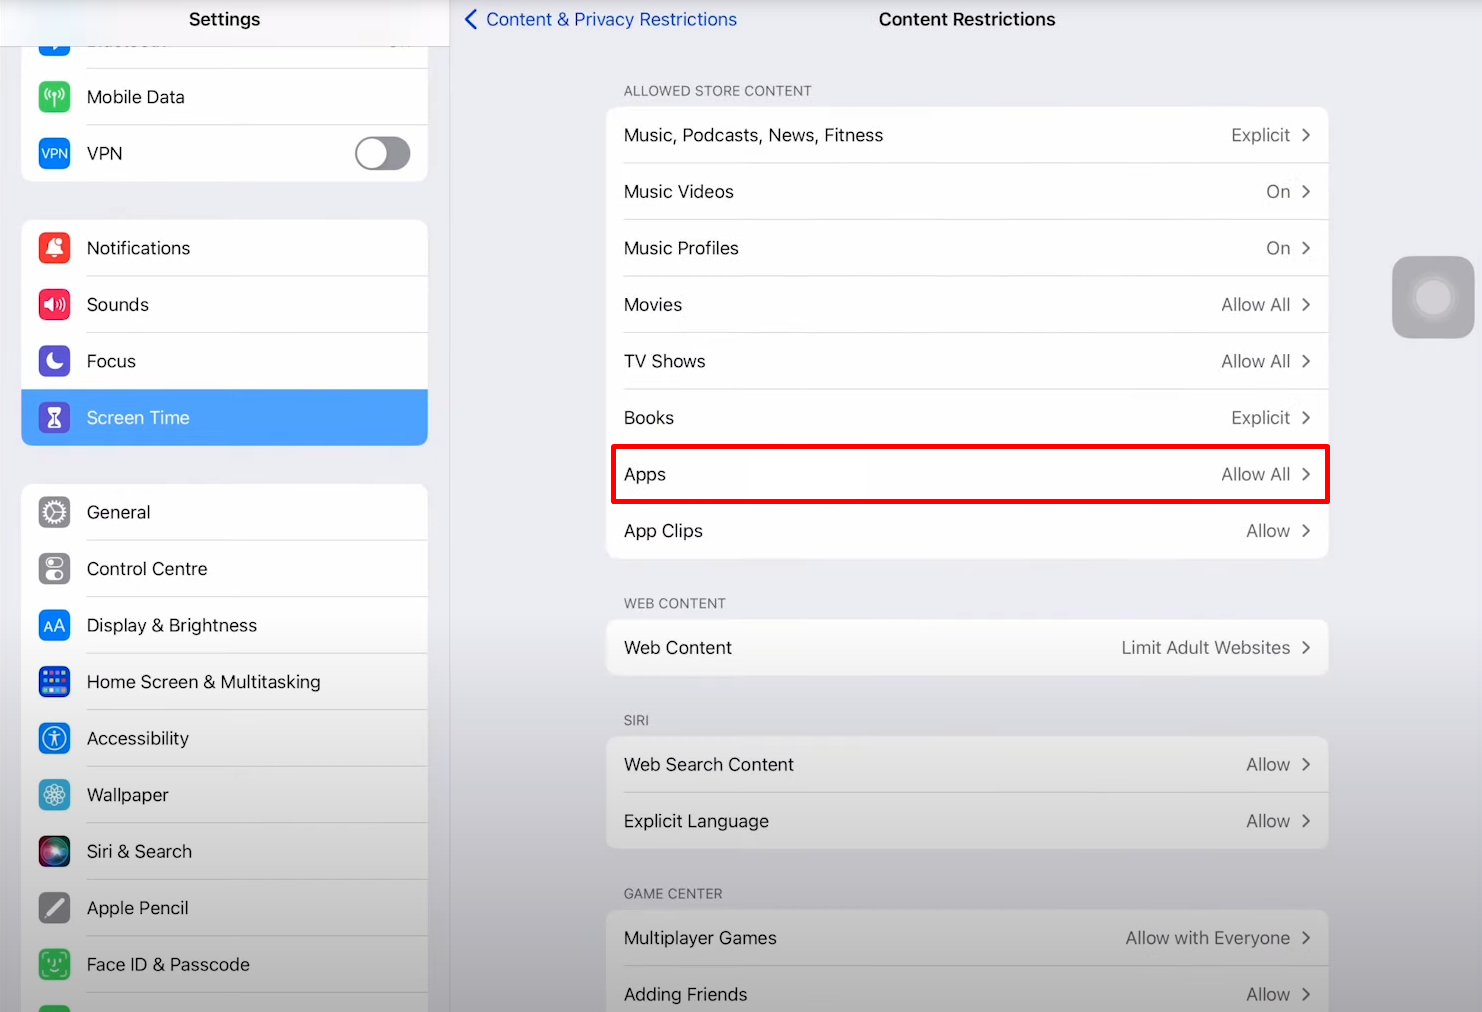
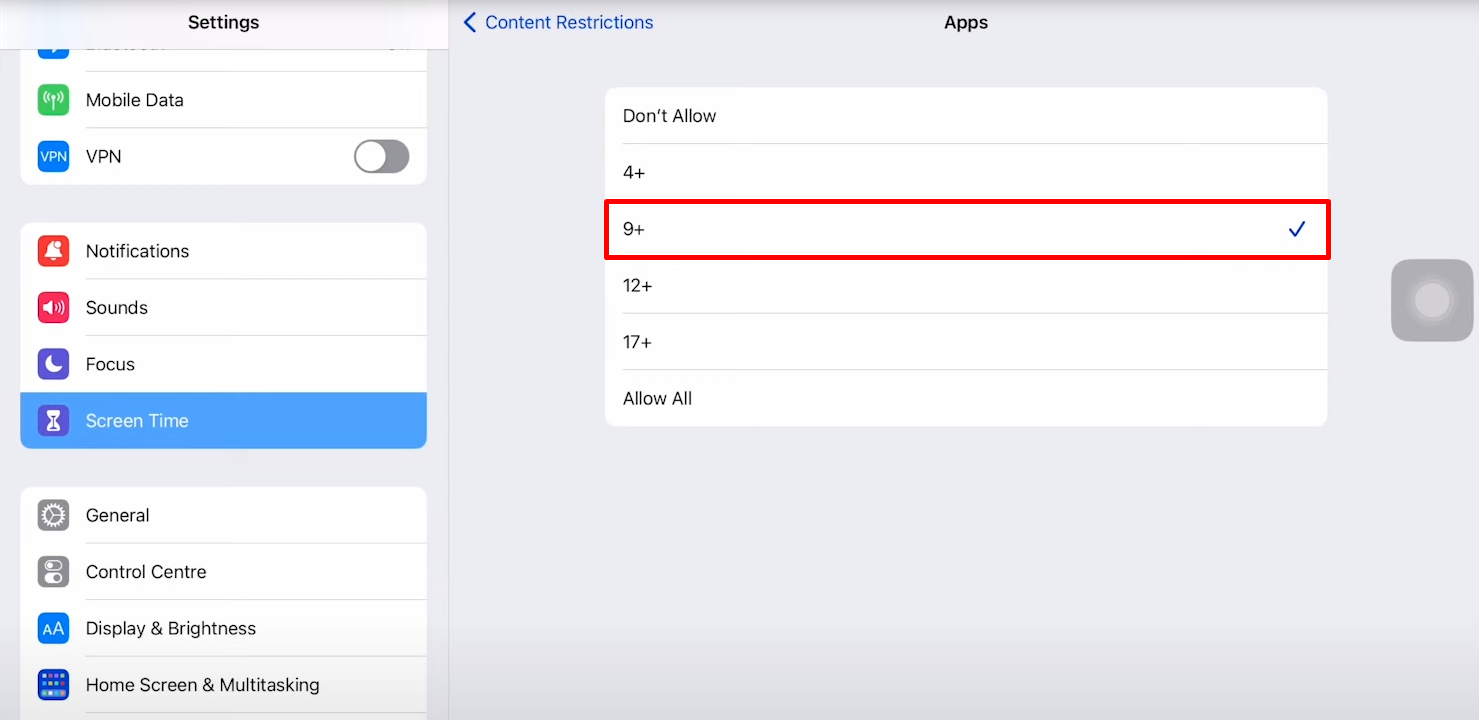
- Now to completely restrict access to the app, you have to mark the 9+ option. It will hide YouTube as well as all the social media applications from the home screen.
- Then you can see that there will be no YouTube app on the home screen.
More to explore in YouTube guides:
- Put Two YouTube Videos Side-by-Side HTML
- Remove YouTube Comment Shadowban: Step-by-Step
- Use Existing YouTube Videos as a Pre-Roll Ad
- Block YouTube on Mac
- How to See YouTube Dislikes
- How to Get a Transcript of a YouTube Video
- How to Change Location on YouTube TV
- How to Disable Private Browsing on YouTube
- How to Quickly Search an Image from a YouTube Video
Frequently Asked Questions (FAQs)
-
How can I block websites on an iPad?

Open the Settings app and select Screen Time > Content & Privacy Restrictions. Then enter your Screen Time passcode and select Store > Web > Siri > Game Center Content. Tap Web Content and then select Unrestricted, Limit Adult Websites, or Only Approved Websites.
-
Will limiting YouTube keep my children from obtaining other online content?

While blocking YouTube can help limit access to potentially hazardous content, it is also crucial to take thorough online safety precautions, such as using parental controls on other devices and discussing safe online practices with your children.
-
How can I permanently disable YouTube on my iPad?

Navigate to Content & Privacy Restrictions, then Content Restrictions, and finally Web Content in the Screen Time settings. Select Limit Adult Websites and include 'www.youtube.com' in the 'Never Allow' list. This method blocks YouTube in all iPad web browsers.
-
How can I set up parental controls on my iPad?

iPad parental controls can be enabled using the built-in settings or iCloud. To configure parental restrictions using the built-in options, navigate to Settings and then General. Next, choose Restrictions. If you've never set limitations on your iPad before, you'll be asked to generate a passcode.
-
How can I enable restricted mode on YouTube on my iPad?

Sign into your YouTube account after opening the app on your iOS device.
In the top-right corner of the screen, click on your profile symbol.
Select Settings > General.
Turn Restricted Mode on and off.
In Conclusion
This guide has provided you with a variety of options for blocking YouTube on your iPad, including website blocking, app limits, and password protection. Remember to think about your needs and the potential consequences before using these strategies.
