Table of Content
Gmail is among Google's top email services, as we all know quite well. Many more functions are available in Gmail for email account access.
Adding, removing, or changing your phone number is possible if you use Gmail for your account.
We'll talk about adding and changing phone numbers in Gmail accounts in this detailed blog.
What is Gmail?
Google offers a free email service called Gmail. Gmail functions just like any other email service in that it allows you to send and receive emails, prevent spam, build an address book, and carry out other standard email functions. However, it also offers a few more special characteristics that contribute to its popularity as one of the leading online email providers.
Why Should You Remove Your Phone Number From Gmail?
There may be a security risk if you connect your phone number to Gmail. Someone could be able to change your Gmail password and access your email if they manage to get their hands on your phone or phone number.
Almost 5 million Gmail passwords and addresses were leaked online in September of 2014. In this case, you would rather avoid having your phone number easily accessible via your email.
Discover if Your Most Critical Identifiers Have Been Exposed on the Dark Web
Receive timely alerts and actionable insights with PurePrivacy's Dark Web Monitoring.
How to Remove Your Phone Number From Gmail
Step 1: When using Google Accounts, log in to your account via Gmail, the Google homepage, or any other location.
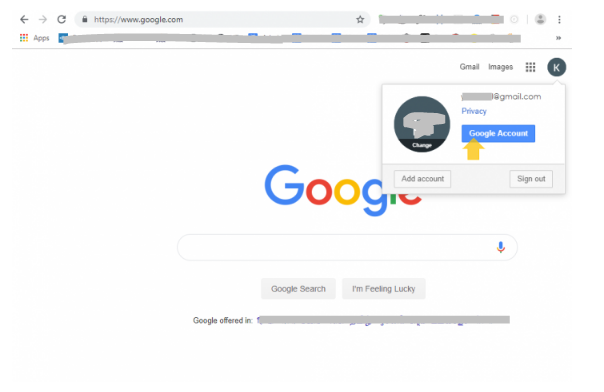
Step 2: You will see the screen below after hitting that button. Select the tab for "Personal info."
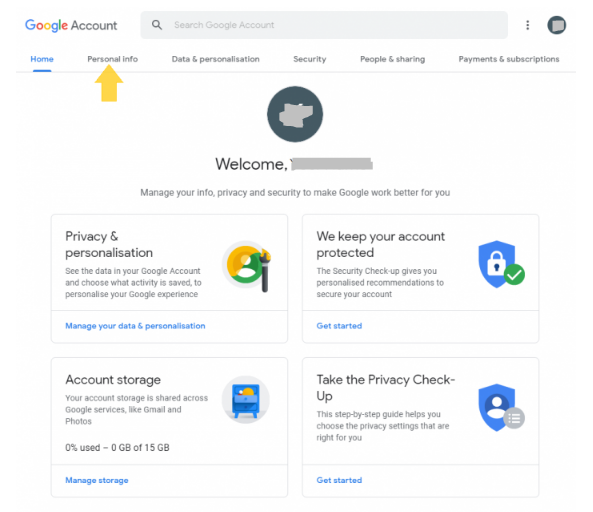
Step 3: You will see this screen when you choose Personal details, with a phone number in the Contact info section. Select the row labeled "PHONE."
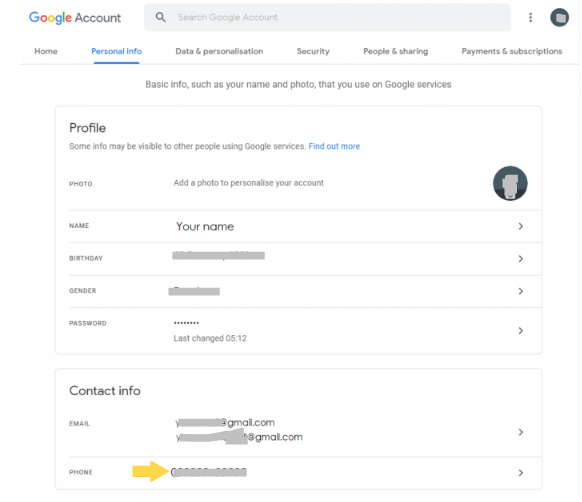
Step 4: You will see your phone number and status (confirmed) after selecting PHONE. Press that button.
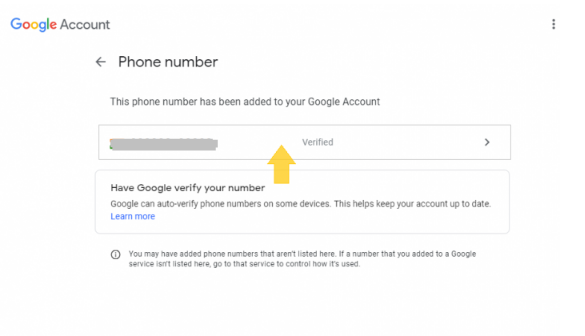
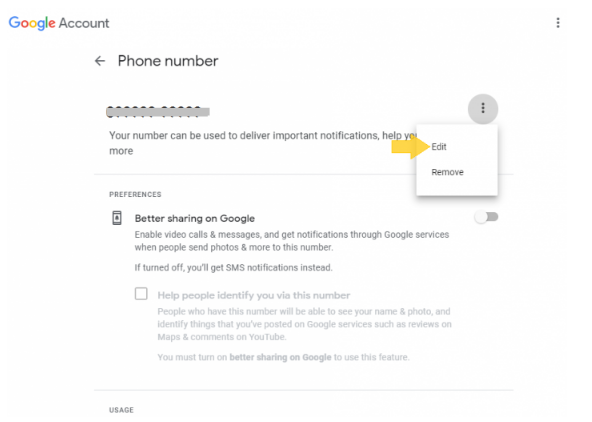
Step 5: Clicking the three dots on the right will now give you the opportunity to change your phone number. Select the edit option from the menu by clicking on it.
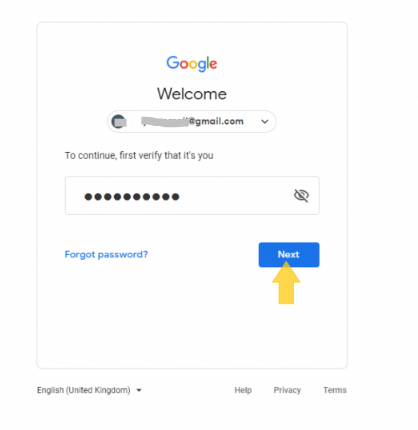
Step 6: You will now be sent to the login page where you can update your password. After completing that step, select Next.
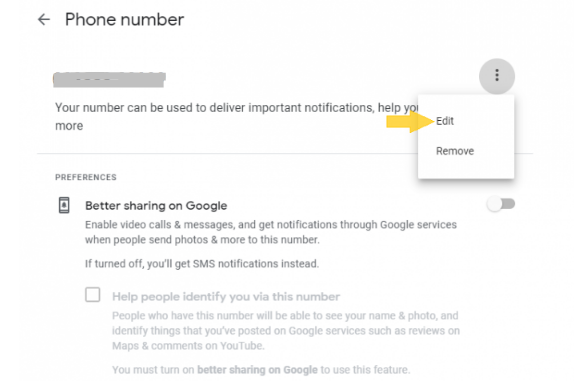
Step 7: You will now be taken back to the same page as in step 5. Select the Edit menu item.
Step 8: A popup requesting to update the number or cancel will now appear. Click UPDATE NUMBER to update the phone number.
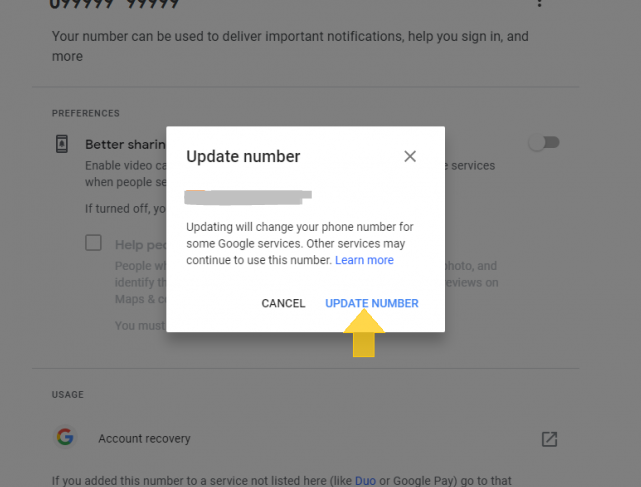
Step 9: You may now enter a different number in that box. Click SELECT after entering the new number in the textbox.
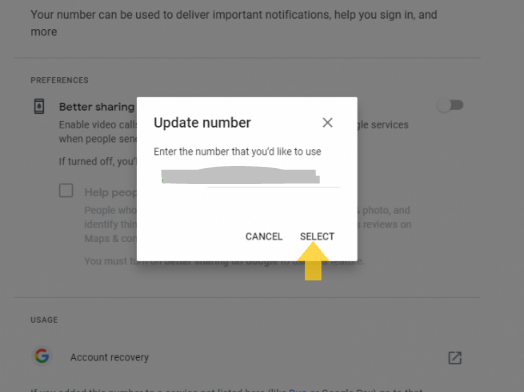
Step 10: Once that number has been selected, a confirmation to move on to the next stage will appear. Select NEXT to continue.
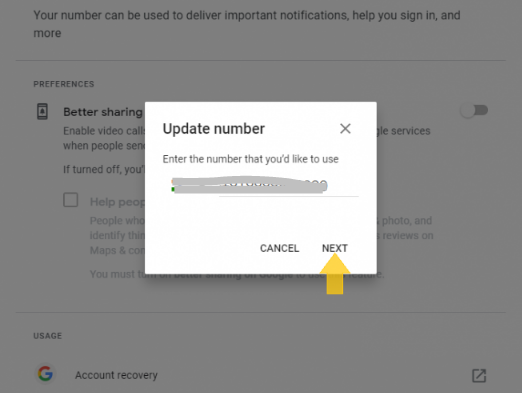
Step 11: Your number will be prepared for confirmation when you click NEXT. The opportunity to obtain a confirmation code will be displayed on the screen. Press the "GET CODE" button.
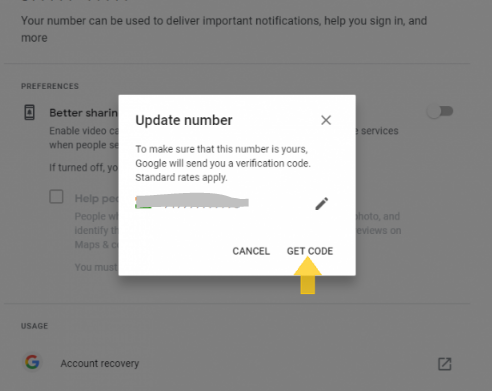
Step 12: You will get an SMS on that phone number with a Google verification code after clicking GET CODE. It will ask for that code on the screen. After checking your phone, click VERIFY after entering the six-digit Google Verification code.
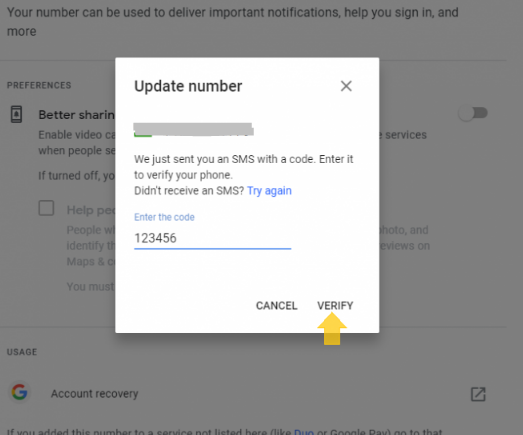
Your phone will be successfully confirmed if the Google Verification code you supplied is accurate.
Is It Good to Use Gmail without a phone number?
You may use a Google or Gmail account without a phone number in many regions of the world. Google actively markets the concept of getting in touch with you for verification codes and helping you out when your account becomes locked.
However, nothing negative will happen if you decide not to provide your number. Your Gmail and Google accounts will function normally.
You may only use the same phone number for up to four distinct accounts if you choose to add it for security reasons. After that, you may use a Yubikey or another alternative security verification method, such as two-factor authentication.
What to do if Gmail Still Asks for a Phone Number After Removing it?
A phone number is only required once by Gmail to validate your account. You can delete any phone number connected to your account once it has been validated. You may also get an SMS verification from Google by using a fake phone number.
If Gmail asks for a phone number from inside your country, you may always use a VPN to fool it into believing you are in a different part of the world.
While creating a Gmail account on a desktop computer, you may occasionally be asked for your phone number; however, if you use your phone, this is not required. You may do this immediately from the Gmail app or through your phone's settings.
Secure Your Social Media Simply with PurePrivacy
The Social Media Manager from PurePrivacy is your one-stop solution for safeguarding and streamlining your online presence. With just one swipe, you may apply the customized security adjustments it recommends once it analyzes your accounts. Use PurePrivacy to regain control over your privacy!
Detects Vulnerabilities
PurePrivacy searches your accounts for places where your private information could be exposed.
Personalized suggestions
The manager makes recommendations for certain actions to enhance your privacy based on the security level you have selected.
Easy to use
Strengthening your privacy settings is made simple by being able to accept the recommendations with a single press.
Frequently Asked Questions (FAQs)
-
Is it possible to change my phone number in Gmail?

On the Google Account interface, choose Personal Information. Scroll down to the Contact details area of the Personal details screen, then click the stated phone number. Again, choose the phone number that is shown. Click the Edit button (pencil symbol).
-
How can I update my Gmail phone number without logging in?

Regretfully, you can only update the phone number when you are in your account. Using the Google Account Recovery tool is what I advise. If you know one of your old Gmail passwords and can provide basic account information, you ought to be able to retrieve the account.
-
How can I use two-step authentication if my phone number has changed?

Launch the application or service you use to verify your identity twice. Go to the account settings or security area. Search for the option to modify your two-step verification settings or to change your phone number. Enter and confirm your new phone number by following the prompts.
Secure Your Gmail Account From Spammers!
In Gmail, changing your phone number is a simple and fast process.
However, PurePrivacy is a good option for complete online privacy control.
It helps you protect your information online and manage your digital footprint, going beyond individual accounts.

